Agent Explorer
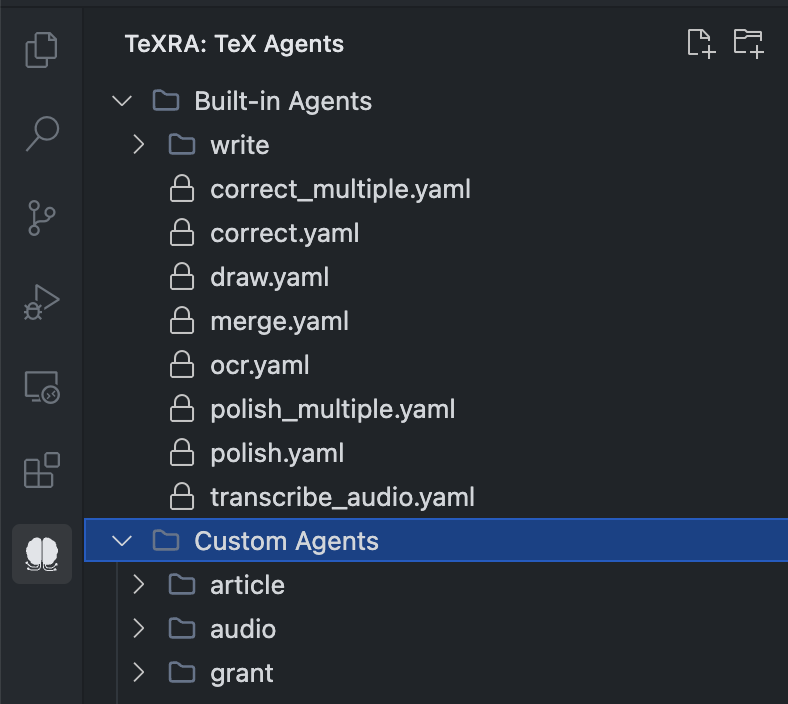
The TeXRA extension includes a dedicated Agent Explorer view within the VS Code sidebar, typically located under the main TeXRA panel (identified by the logo icon). Think of it as your command center for browsing, inspecting, and managing the AI personalities (agent definition files) that power TeXRA's capabilities.
Structure
The Agent Explorer is organized into two main sections:
- Built-in Agents: This section displays the standard agents that come bundled with the TeXRA extension. These files (
.yaml) define the core functionalities likecorrect,polish,draw, etc. - Custom Agents: This section displays agents that you have created or added yourself. By default TeXRA seeds a
custom_agentsfolder inside its global storage. You can change the location from the Agents tab in the TeXRA Dashboard (click Change in the directory info bar).
Browsing and Viewing Agents
- Expand/Collapse: Click the arrows next to folder names (including "Built-in Agents" and "Custom Agents") to expand or collapse them.
- File Icons: Folders are marked with a folder icon , and agent definition files (usually
.yaml) are marked with a file icon . - Opening Files: Click on an agent file name to open it in the editor.
- Built-in Agents: These files are read-only to prevent accidental modification of core functionalities (it's usually best not to tinker with the pre-built magic!). They will be marked with a lock icon and VS Code will prevent saving changes. If you want to modify a built-in agent, it's recommended to create a copy in your Custom Agents directory.
- Custom Agents: These files can be opened and edited normally.
Managing Custom Agents
You can manage your custom agent files directly within the "Custom Agents" section of the explorer:
- Right-Click: Right-click on a file or folder within the "Custom Agents" section (or on the "Custom Agents" root folder itself) to access the context menu.
- Title Bar Icons: Some actions might also be available via icons in the view's title bar when the "TeX Agents" view is focused.
Available actions for Custom Agents include:
- New File : Creates a new file populated with a starter template (e.g.,
new-file.yaml) within the selected folder (or the root custom agents folder). You will be prompted to rename it immediately. - New Folder : Creates a new folder within the selected folder. You will be prompted to rename it.
- Rename : Renames the selected custom file or folder.
- Delete : Deletes the selected custom file or folder (with confirmation).
- Add Agent to Config : Validates a YAML file and adds the agent to the visible agents list.
- Create AI Agent : Launches a wizard that collects a short description and output style (single vs. multiple files) then generates a starter YAML using Claude. This is also accessible from the New Agent button in the Agents tab of the TeXRA Dashboard. See Strict XML Extraction for why the YAML must be precise.
- Reveal in OS : Opens the selected folder in your operating system's file explorer so you can paste or manage files directly.
Important: These management actions (New File, New Folder, Rename, Delete) are not available for items within the "Built-in Agents" section.
Relationship to Custom Agent Creation
The Agent Explorer is where you manage the files you create following the steps in the Custom Agents guide. Use the explorer to organize your agent .yaml files effectively.
Agent Configuration Alerts
When an agent is enabled in the Agents tab but its YAML file is missing, it appears disabled in the main view dropdown. Choosing such an entry shows a banner offering to open the custom agents directory or view documentation. Agents that include a companion <agent>_multiple.yaml are flagged with a badge in the dropdown to indicate multi-output support.